

Tagging can be a powerful tool for any customer support team. When done correctly, tags serve as a common language to communicate the customer journey at scale—when having one person keep in touch with every single customer is no longer an option.
Contents
- “When it was just me, I knew everything, so I was the entire voice of the customer.
- Now we’re bigger. When we give feedback, folks ask, ‘How much of a problem was that last week? Is this just what you remember or is this a real trend? Are all the agents seeing the same trends?’ “
- To avoid tag bloat, have a clear goal in mind
- Tip 1: Start by deciding why you want to tag customer support cases. Here are the most common non-routing reasons:
- Understand the customer experience to improve your products.
- Understand the customer experience to reduce the costs associated with supporting your products.
- Understand the customer experience to improve the quality and consistency of your customer support interactions.
- Consider organizing tags by Product Areas
- Tip 2: Do a complete product diagram and list each area of your product that a user might see. Those are your starting tags.
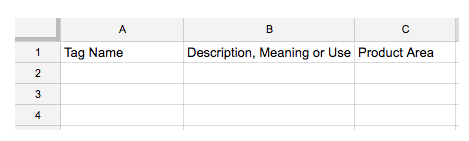
- Tip 3: Keep a database of tags, tag descriptions, and any other data your teams will find helpful about each tag. A simple spreadsheet will do, as most help-desks do not have this functionality built-in.
- Start with a spreadsheet with the following columns:
- Shoot for easy decisions for agents
- Keep the number of tags small to start
- To get started, test your tagging around a recent product/feature release
“When it was just me, I knew everything, so I was the entire voice of the customer.
Now we’re bigger. When we give feedback, folks ask, ‘How much of a problem was that last week? Is this just what you remember or is this a real trend? Are all the agents seeing the same trends?’ “
– Recent Idiomatic customer interview
Tagging can provide the quantification necessary to answer these questions by aggregating data across the entire support team. But, smart support leaders know tagging will only be effective if the tags are designed properly, the agents are trained consistently, and someone is held accountable for the accuracy of the tagging. So, whether you are developing a tagging process for the first time or redesigning one that has become unwieldy, here are some practical considerations to help you get started.
To avoid tag bloat, have a clear goal in mind
An effective tagging process is designed not grown. All too often teams will default to using the built-in tagging function in their help-desk without a clear plan in place. The result can be a tangled web of tags that have each been created by different agents for different purposes. At Idiomatic, we call this “tag bloat”.
“We often speak to companies with over 1,000 tags, but only regularly use ~200.”
The problem with tag bloat is that new agents don’t know which tags to use or how to interpret them. In addition, getting any useful analysis from such a jumbled mess is impossible.
Tip 1: Start by deciding why you want to tag customer support cases. Here are the most common non-routing reasons:
-
Understand the customer experience to improve your products.
-
Understand the customer experience to reduce the costs associated with supporting your products.
-
Understand the customer experience to improve the quality and consistency of your customer support interactions.
Once you have a goal firmly set in mind, you can use it as a guiding light to craft your tagging system. Aim for simplicity (easy to implement reliably) and clarity (useful to achieve your goal). As the designer of the tags you should be responsible for maintaining the tag hierarchy. As new agents come in, you will have to train them on what each tag means and how to use it.
The most intuitive way of organizing customer support cases is to split them by which part of the product is responsible for the case; we call them “product areas”.
As your team become more proficient at tagging, you may want to split each product area into multiple sub-categories (as we do at Idiomatic). In this case, you still need to maintain a strict definition of which tag goes where.
Start with a spreadsheet with the following columns:
Shoot for easy decisions for agents
Consistent use of tags across agents is vitally important so that insights from all cases can be aggregated and understood together. Suppose two tags exist, one called “user cannot login” and another called “trouble logging in”. What is the difference between these tags? How would a product person answer even simple questions about login unless they were the one who created the tags? For this reason, categories should be mutually exclusive and collectively exhaustive.
There are two ways to fix ambiguity, split the two tags into more specific tags to make it more obvious where a specific case falls or combine the tags into a less granular tag that is obviously inclusive of all of the unclear cases. Unless you have specific reasons (or ability) for doing otherwise, we recommend you go with the combining approach until you are ready for more advanced treatment of tags.
Tagging is not free. Agent time costs money and distracts from the process of actually answering tickets. Therefore, the best tagging systems are simple and succinct so that agents can use them with very little cognitive effort. Tags should be able to be quickly applied to a case by an agent.
Consider a toy example of a company that has 200 customer support agents making on average $40,000 per year. This company spends $8M per year on customer support salary alone. In this case, the difference between the agents spending 2% of their time and 15% of their time tagging tickets is over $1M per year.
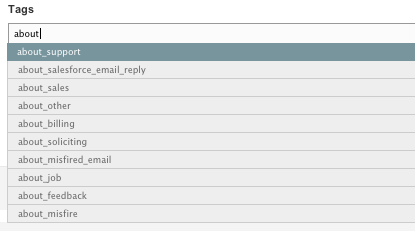
You should also be cognizant of how you name these categories. Agents most often tag by typing into an auto fill box and selecting from a drop down so the names of tags that are most often used should start with different letters to differentiate the auto fill dropdown that results as the agent starts typing.
You can use specific prefixes to control the drop downs. Uber, for example, might split rider and driver cases on a prefix such as “r_” and “d_”. Prefixes should be kept short so that they can be quickly typed. That way, when an agent types “r”, all of the rider tags are immediately revealed.
Note: an alternative to prefixes is to separate such data into custom fields, which we will handle in a future post covering more advanced tagging models.
To get started, test your tagging around a recent product/feature release
Now that you have clear goals in mind, have designed a well thought out tagging process, and have a spreadsheet where you have an initial list of tags, you are ready to implement tagging.
Tip 7: Start by doing ad-hoc deep dives into particular periods of time that you care about, perhaps following a major feature release, to see if your tagging will accomplish your goals.
Before rolling out a tagging scheme to all agents, we recommend that you test your tagging scheme on cases from a specific period of time where you’d expect tagging to answer a useful question that will help you achieve your goal, like “what did customers think of this product release?” If you get the insights you wanted from the tagging scheme, then consider training every agent to tag every case to give your company this valuable insight into the customer experience. If the test fails to answer the questions satisfactorily, then revise your tagging scheme until it does.
A well implemented tagging system gives the customer support team the data needed to improve the product, reduce support costs, and improve support consistency. Here at Idiomatic, we think about this all day, so let us know if you have any more questions and would like to see a custom demo.